This week we focused on the basic defense Force Middle.
Drill in Visualize https://canva.link/x5a1ugcggjnh8b0
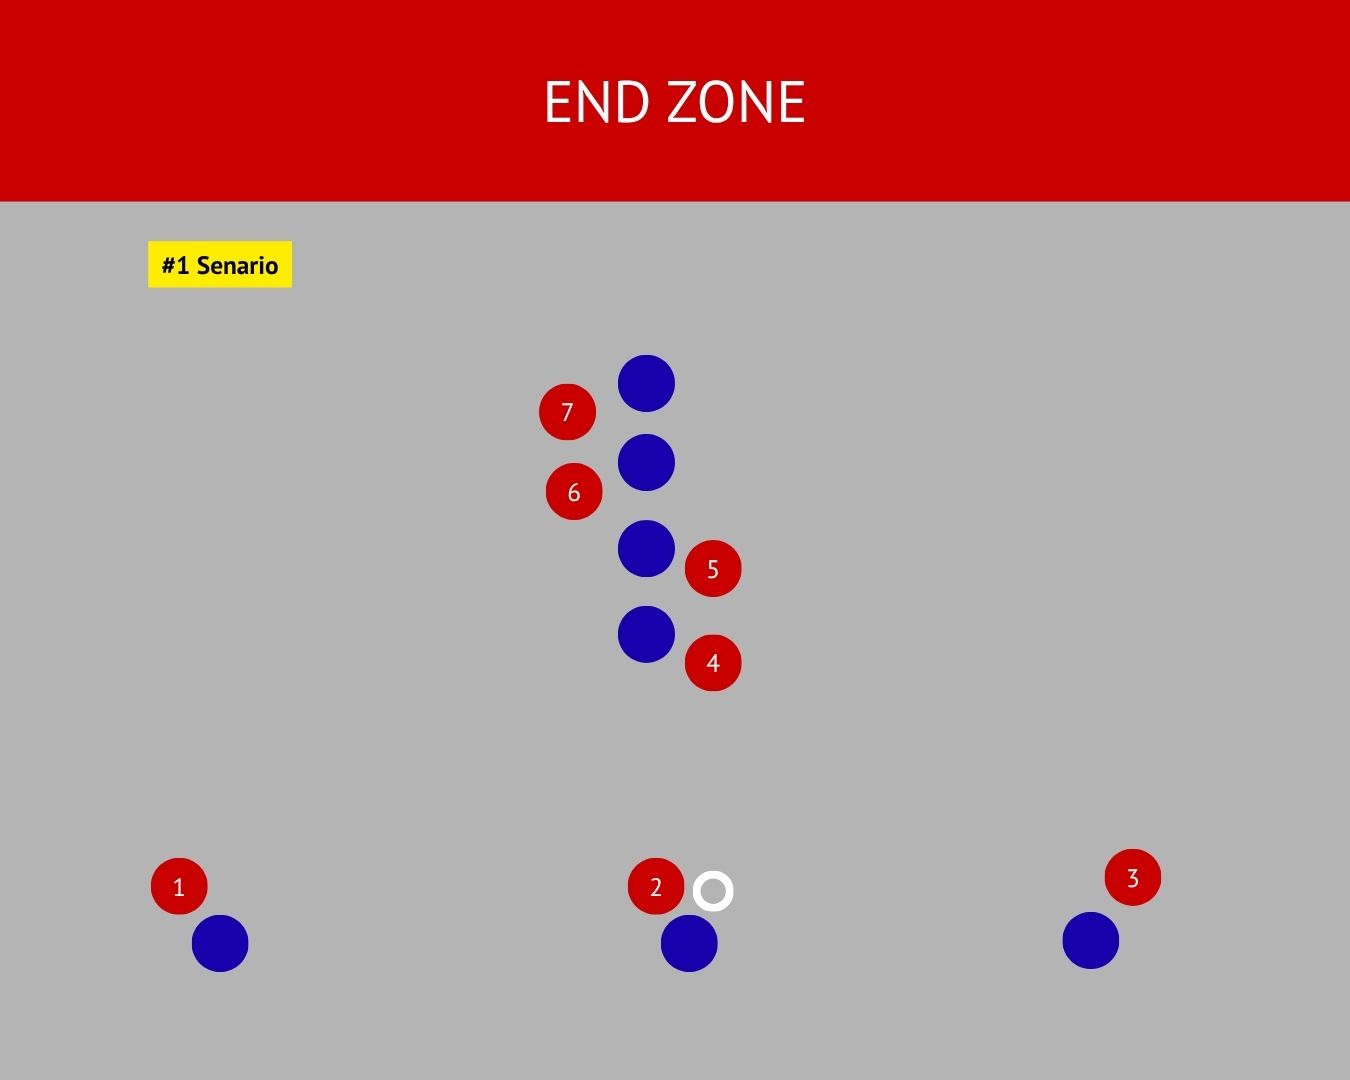
Scenario 1: Disc in the Middle
The Mark: The defender on the disc forces forehand. This is intentional because a short, touch-forehand throw is mechanically harder to execute under pressure than a short backhand.
Front stack defense (4)(5): Orbit and shift to the open side to clog the primary throwing lanes.
(6)(7): Position themselves on the break-side (opposite of (4)(5). They don’t need to overcommit to the open side because they already have front stack defenders helping downfield. By locking down the break-side, they prevent elite throwers from exploiting the defense with inside-out (IO) or break-side throws.
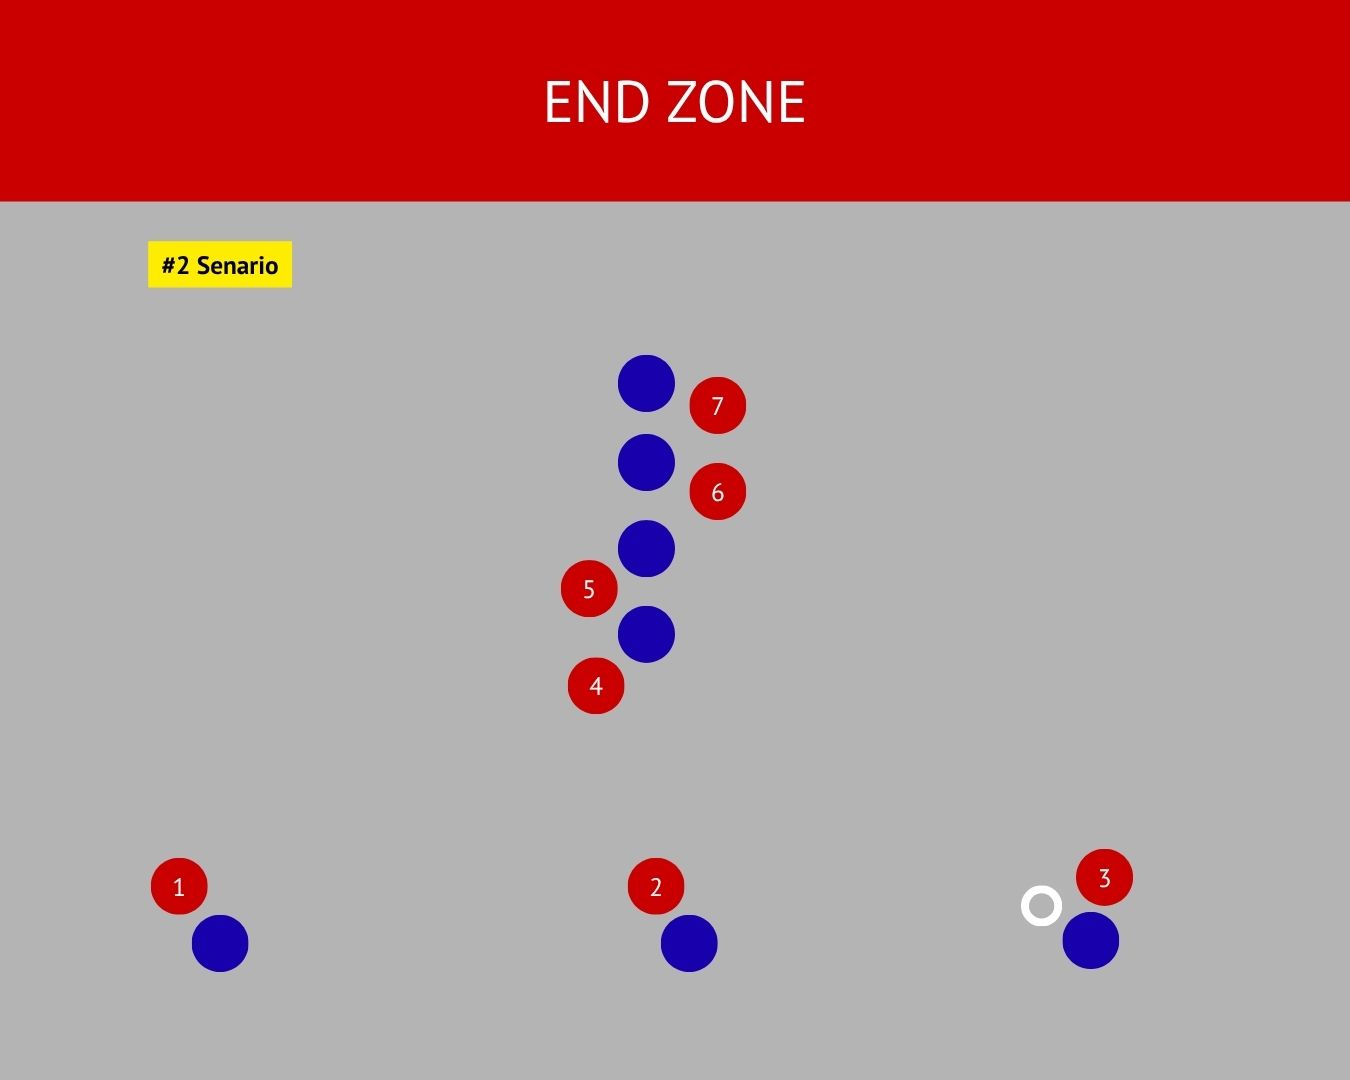
Scenario 2: Disc Swung to the Right Sideline (The Trap)
The Mark (3): Instantly forces backhand. This applies maximum sideline pressure to the handler, choking off forward options and forcing a negative reset pass back to the middle.
Front Stack Defense (3)(4): Adjust their mark to the open side, squeezing the active cutting lanes and forcing the offensive receivers to cut directly into dead space.
Deep Defend (6)(7): Orbit to the opposite side of the field (away from 3 & 4). Their primary job is to hold defensive balance and shut down any quick continuation throws if the handler manages to break the mark.
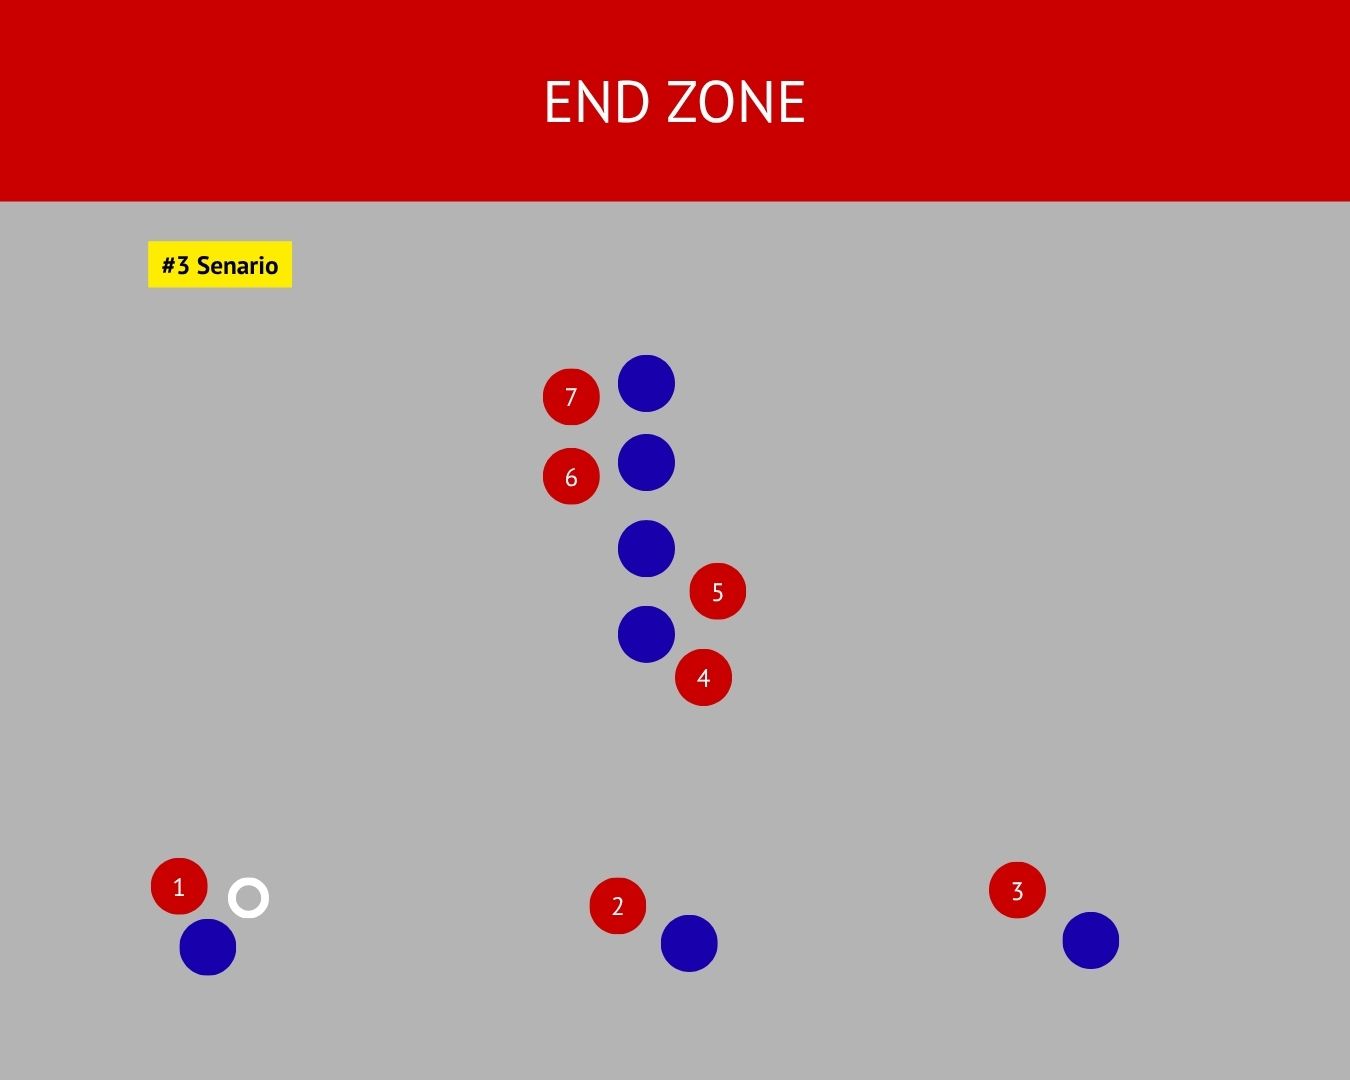
Scenario 3: Funneling Back to the Center
The Mark (1): Forces forehand. This blocks the wide side throws and forces the handler to look toward the middle of the field.
Front Stack Defense (3)(4): Stay flat (or overplay the open side), force the cutter to go for inside-out to the outside-in lane, that way it more like to force the disc for turn over.
Deep Defense (6)(7): Stay on the opposite side of the field to guard the deep space in case it’s a high stall count or elite handler could throw a deep huck on the stack.